How to Clean Oil Off Garage Floor

how to clean garage floor

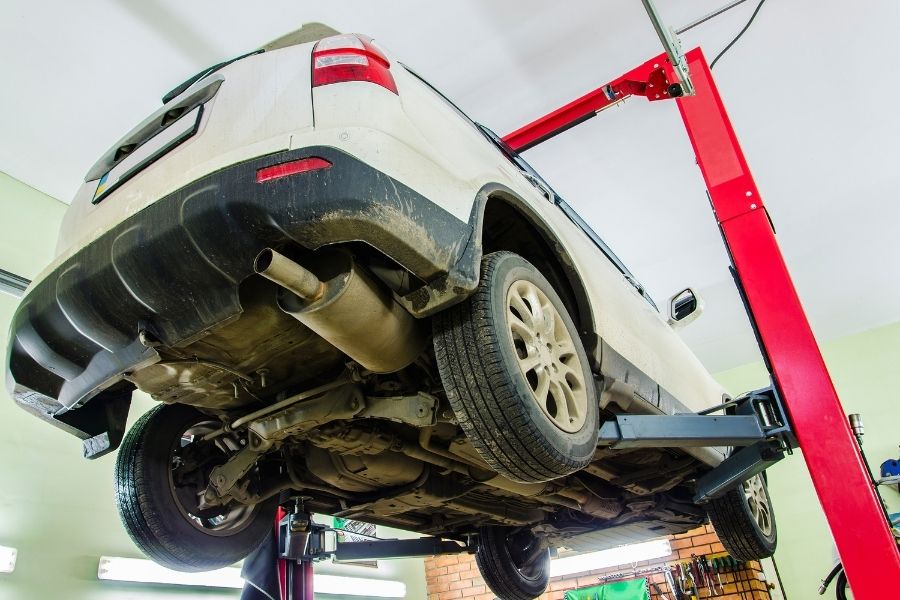
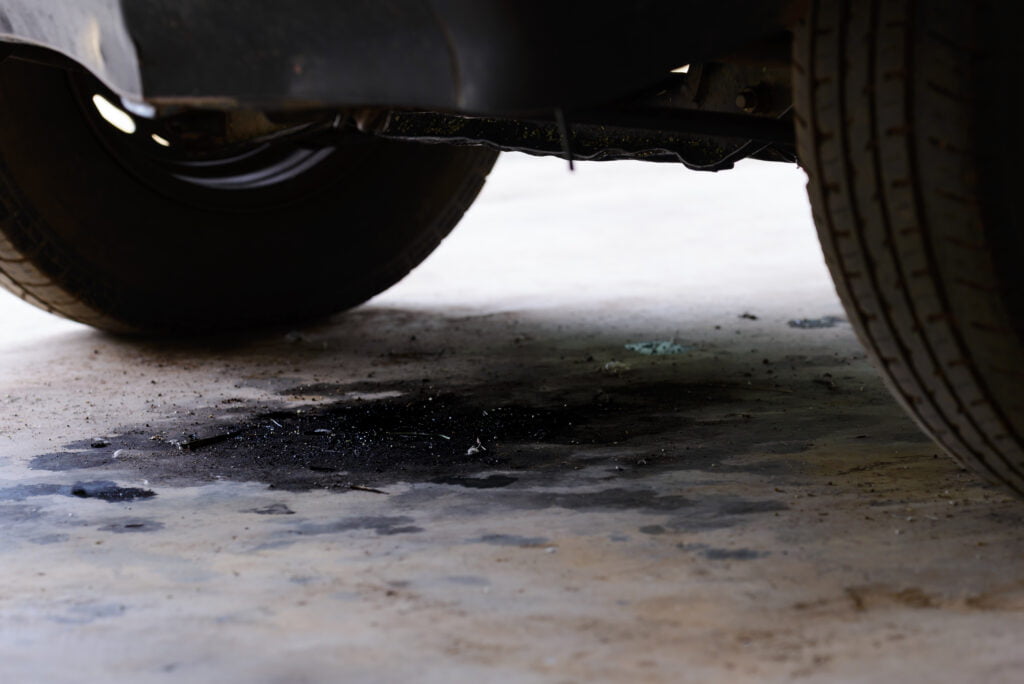
At some point and time, everyone runs into this problem: you are working in the garage and all of a sudden, an oil spill occurs. Not only does an oil spill on your garage floor decrease the aesthetic value of your garage, but also oil stains can be notoriously difficult to remove.

Not all oil stains respond to same removal treatment either.  Indeed, the longer the oil spill  remains on your floor, the more tenacious these stains are able to resists removal efforts that may have worked on other oil stains. Whether you are dealing with a fresh oil stain or an old, stubborn one on your garage floor, if you need to know how to clean oil off your garage floor the following stain removal techniques will assist you in effectively removing the oil stain and restoring your garage floor’s cleanliness.

Methods to Remove Oil Stains

An oil stain can leave a discolored spot on your garage floor which appears discolored or greasy. Prior to performing any process to remove the oil stain, use caution to ensure you have adequately cleaned the area where the oil stain is located. A key fact to remember when you are working to remove the oil stains on your garage floor, remember what worked for one oil stain may not work for a different oil stain. As such, implementing more than one of the methods listed below will help ensure you can successfully remove the oil stain from your garage floor. Whether you are looking how to clean oil off garage floor or if you are looking to avoid acquiring an oil stain on your garage floor, read down to the end of the article for methods on how to avoid an oil stain.

Sawdust or Cat Litter

This is an easy method to remove oil stain from your garage floor only using somewhat common household items. You will deed sawdust or cat litter and a push broom with rigid bristles. First, start with the sawdust or cat litter. Second, place this substance on the oil stain in your garage floor. Allow the sawdust or cat litter to remain on stain for at least twenty-four hours. Third, retrieve the push broom with rigid bristles and use this push brush to sweep up the sawdust or cat litter. At this point, the oil stain should be removed from the garage floor.

Dishwasher Detergent

Another method to clean the oil stain using a common household item is to utilize dishwasher detergent. You will need dishwasher detergent, water, and a push broom with rigid bristles. First, pour the dishwasher detergent on top of the oil stain. Allow the dishwasher detergent to sit on the oil stain for a minimum of forty-five minutes. Next, heat a pot of water so that it is rapidly boiling and pour this boiling water on top of the dishwasher detergent. Finally, get the push broom with rigid bristles and thoroughly scrub the area until the oil stain is removed.

Kerosene

You can also utilized kerosene to remove an oil stain. Kerosene is an organic solvent that breaks down oil’s bonding agents. You will need kerosene, a nylon scrubbing brush, and a high pressured water from a garden hose.  First, generously pour kerosene upon the oil stain. Next, vigorously scrub the kerosene into the oil stain using the nylon scrubbing brush. You need to keep scrubbing until the oil stain is removed. Finally, thoroughly rinse your garage floor with high pressure water from the garden hose such that the dye is no longer present on your garage floor.

Oven Cleaner

Yet another method which involves a common household cleaner but at the same time functions to remove a tough oil stain is oven cleaner. You will need a spray bottle, oven cleaner, a nylon scrubbing brush, and a garden hose that is connected to a water source. First, fill the spray bottle with oven cleaner and then spray the oil stain with oven cleaner.  Second, allow the oven cleaner to rest on the garage floor for a minimum of five to ten minutes.  Third, vigorously scrub the oil stain with the nylon scrubbing brush. Finally, use the garden hose on the highest pressure to wash away the oven cleaner. Repeat as many times as necessary to remove the oil stain.

Tri-sodium Phosphate

An additional method to remove an oil stain from your garage floor is tri-sodium phosphate. You will need tri-sodium phosphate, a bucket, water, and a push broom with rigid bristles. To start, mix in the bucket six parts water for every one part tri-sodium phosphate. Next, pour the mixture on top of the oil stain. Allow the solution to stay on top of the oil stain until it dries; the solution will dry in approximately twenty to twenty-four hours. Finally, use the push broom with rigid bristles and thoroughly sweep away the solution.

How to Avoid an Oil Stain and Keep Your Garage Floor Clean

All in all, taking precautionary measures to avoid getting an oil stain on your garage floor is much easier than attempting to remove an oil stain.

The first option to protect your garage floors from an oil stain is to apply an oil stain blocker. Thoroughly applying an oil stain blocker to your garage floor will prevent stains on your floor from oil, chemicals, and water. Another option is to lay down a garage floor oil mat on your garage floor. You can purchase garage floor mats in different sizes, so simply place these oil mats under the vehicle or machinery that is leaking oil.

Proactively implementing measures that will ensure an oil stain will not occur will save you from having to deal with the process of removing an oil stain later on down the road.

Nobody likes an oil stain on their garage floor. Not only is the garage an important part of your house, but a clean garage floor adds to the aesthetic value of your house. We here at SVI pride ourselves in providing leading automotive lifts and shop equipment parts and want to ensure your garage floor remains oil free. The above methods offer a variety of methods you can utilize to remove those pesky oil stains that may be on your garage floor. Similarly, applying an oil stain blocker or a garage floor mat can ensure your garage floor remains oil free while you are able to enjoy a genuine product from us.

How to Find Lift Points On a Car

When it comes to cars, we are all focused on safety.  Whether it is wearing a safety belt, stopping for a red light, following the speed limit, or having your car tell you when to “BRAKE” if you are about to hit an object, our society works to makes sure cars are safe for both the driver and those around the vehicle. 

As with any activity dealing with a car, fixing a car also requires safety precautions. Generally, to fix a car you need to elevate the car to be able to work on the car’s undercarriage. To lift a car, you will encounter what is an all-too-common sight in any mechanic shop: a two-post lift.  Specific safety precautions apply to a two-post lift, such that, if a vehicle were to fall off of a lift, the fall likely was a result of user error, and likely could have been prevented. 

Importance of Proper Jack Point Identification

If the vehicle isn’t lifted properly, it could slip off the jack. This would not only cause severe damage to the vehicle but could also damage your shop and put any mechanic working on the vehicle in danger. Even if the vehicle doesn’t slip, poor jack placement could damage some of the vehicle parts.

Common Types of Jack Points

Frame Rails

Frame rails are part of a vehicle’s structural foundation. They’re made from steel and so can hold up to extensive wear and tear. These rails are often found on older vehicles and vehicles that pull heavy loads.

Subframe

Vehicle subframes are typically made from pressed steel. The subframe is bolted or welded to the vehicle and may support the engine, transmission, or even the full suspension. Most modern passenger vehicles have both front and rear subframes.

Notched Areas

Notched areas include bars, shafts, and other structural elements.

How to Locate Jack Points on Different Types of Vehicles

Sedans & Coupes

The jack points on a sedan or coupe are usually found behind the front wheels and in front of the rear wheels. They’re well-designed, and many vehicle manufacturers will reinforce the points to ensure they can hold the vehicle’s weight when the vehicle is off the ground.

SUVs, Minivans, & Crossovers

The jack point for an SUV, minivan, or crossover will depend on the vehicle’s make and model, so it’s important to check the owner’s manual before attempting to raise the vehicle. Generally speaking, the jack points for these vehicles are found on the frame near each wheel or under the vehicle’s side skirts.

Trucks & Full-Size Vans

The front and rear axles are ideal jack points for trucks and full-size fans, as are reinforced sections of the frame. Jacking from all four corners is safer than trying to jack a large vehicle from a single, central point.In addition to identifying the right jack points for each vehicle, you’ll want to make sure you have the right jack for your vehicle to prevent damage and/or accidents. That’s why SVI offers jacks in multiple sizes and types. Our small equipment lifts, car/light truck lifts, and heavy-duty truck lifts enable you to maintain and repair any type of vehicle. What’s more, we offer a huge selection of replacement parts to keep your jacks in good working order at all times. Get in touch with us to find out more or to get a free quote on the items of your choice.

The Different Types of Two Post Car Lifts              

To start, a two-post list engages the frame of a vehicle to hoist the vehicle into the air. There are three common types of two-post lifts that are used within mechanic shops: symmetrical, asymmetrical, or versymmetrical.

  • Symmetrical: a symmetrical two-post lift is likely the easiest to identify.  With a symmetrical two-post lift, the arms of each lift face each other such that each arm bears 50% of the load.
  • Asymmetrical: an asymmetrical two-post lift, these lifts have arms that are able to swing, but the front and back arms are not the same length.
  • Versymmetrical: a versymmetrical two-post lift allows users to utilize the benefits of a symmetrical and asymmetrical lift at the same time. 

When lifting a vehicle with a symmetrical, an asymmetrical, or a versymmetrical two-post lift, it is important to know how to locate the lift point of a vehicle. 

BendPak reported that accidents resulted from two-post lifts when the vehicle was not properly placed upon the lift: “Vehicles topple or slide off lifts when users don’t adhere to one or more of the following crucial procedures: setting the vehicle at the proper lifting points; installing the wrong lift adapters; using adjustable adapters in the wrong fashion; neglecting to account for the vehicle’s center of gravity.” 

How to Find Jack Points on a Car 

In order to make sure both you and your vehicle stay safe while using a two-point lift, we recommend following the below instructions and suggestions while operating a two-post lift. 

First and foremost, when operating a two-post lift, you need to know where the vehicle’s center of gravity is. Please take note that the center of gravity is not necessarily the center of the vehicle. Eyeballing the vehicle and attempting to guess where the center of gravity is without truly knowing can result in harm to the lift, the vehicle, or even yourself. Thus, when we say, “center of gravity,” we are referring to the location between the front and back wheels where the weight of the vehicle is evenly distributed. 

The center of gravity varies depending on what type of vehicle you are working with and what model the vehicle is. For instance, the center of gravity on front-wheel-drive cars is slightly in front of the driver’s seat; while, in contrast, the center of gravity on rear-wheel-drive cars is below the driver’s seat. 

As a simple solution, locate the vehicle’s car manual from the manufacturer and follow the stated lift points therein. If the car manual does not state where the lift points are located on the vehicle, you can call the maker of the vehicle’s customer service line. Alternatively, the internet offers an abundance of research; do some in-depth digging on the make and model of the vehicle you will be working on to find the vehicle’s lift points. 

Furthermore, if you’re wondering how to find jack points on a car, you can make use of vehicle lifting guides. These guides will help you identify the specific lifting points on your car where you can safely and effectively place a jack for maintenance or repairs. The Automotive Lift Institute produces such a manual. According to Automotive Lift Institute, their manual is “updated annually to provide the manufacturer-recommended lifting points on thousands of domestic and imported cars, SUVs, vans and light trucks sold in the United States and Canada.” Automotive Lift Institute’s current manual covers vehicles from 2000 through 2022. Click here for more information on how to purchase this manual. 

If the car’s manual, the car manufacturer’s call center, the internet, or another manual does not help you find the car’s lift points, you can always measure for the center of gravity and determine where the lifting points can be found. 

To locate the lifting points for a single axle vehicle, utilize the following steps: 

  1. Figure out the gross weight of the vehicle
  2. Determine the rear and front axle weights
  3. Plug those numbers into this formula: (Front axle weight x distance from RDL to front axle) + (Rear axle weight x distance from RDL to rear axle) = total moment
  4. Divide the total moment derived from the formula above by the gross weight of the vehicle, this will give you the center of balance for the vehicle 

Whenever you are driving a vehicle, it is important you use undertake safety precautions. Likewise, whenever you are working on a vehicle, it is equally as important you undertake all safety precautions. When operating a two-post lift, it is paramount to your lift’s safety, your workspace’s safety, and the vehicle’s safety that you make sure the proper lifting points are being utilized. By following these above steps, you can make sure both your lift and the vehicle, do not sustain any damage.

SVI International: Your Solution for Car Lifts and Lift Parts

If ever in doubt about what kind of lift or lift parts you need to complete a maintenance repair on your vehicles, SVI International is always here to help. As a leader in repair parts for automotive lifts, you can always expect prompt delivery from one of our three warehouses across the United States. Reach out to us at (800) 321-8173 or complete our online contact form. Browse our selection of lift accessories and supplies or reach out if you are in need of something custom for your space!

How to Know When to Replace Wheel Equipment

An auto repair shop’s wheel equipment is among the most important components needed for daily operation.

Each tool serves a unique purpose, often used for common maintenance needs. In the content below, we explore various types of wheel tools followed by discussing the signs that it’s time to replace wheel equipment in your auto shop. Throughout the article, we will also emphasize one of the most common pieces of wheel equipment: tire changer machines.

The Various Types of Wheel Equipment

Rim Straightener

Any number of items can damage a rim or wheel. Curbs, debris, potholes, road hazards, speed bumps, and the list of unprecedented, sometimes unavoidable, hazards goes on. Clients entering an auto repair shop with a bent rim tend to fear the worst: an expensive wheel replacement. However, functioning rim straighteners often make full wheel replacement unnecessary. In fact, if you operate an automotive or service shop with a rim straightener, you are often set apart from local competition as larger vehicles, SUVs, and luxury cars often require more expensive wheel repair.

Straightening a rim, rather than replacing one or more wheels in entirety, provides an economical and cost-effective option. Even if you consider yourself a self-proclaimed automotive enthusiast and perform repairs out of your garage, a rim straightener will serve as an excellent long-term investment.

Wheel Alignment

Proper wheel alignment is extremely important, and wheel alignment machines are a common commodity in both auto repair shops and in-home garages. In fact, even a miniscule misalignment can cause serious issues when turning the wheels or breaking. Symptoms of misaligned wheels such as uneven tire ware and wheel vibration severely stunt tire life. Therefore, good wheel alignment machines are essential for any automotive, repair, or home shop.

Wheel Balancers

For shops installing wheels, a properly functioning wheel balancer is indispensable. Simply due to the wheel manufacturing process, tires are imperfectly balanced after installation. As a result, imbalanced tires can cause shuddering and vibration while in movement.

Overall, balanced wheels are important for safe, comfortable driving and prolonged vehicle life. Furthermore, a properly working wheel balancer is imperative for any vehicle shop performing wheel repair and installation.

Tire Changer Machines

Tire changer machines are yet another essential component to an automotive shop, especially shops consistently performing wheel repairs. In comparison to manual installation, tire changer machines save time, energy, and manpower. Mechanics and repair shops accustomed to regularly utilizing a tire changer machine require a functioning tool.

When to Replace Wheel Equipment

Your automotive shop’s wheel equipment is crucial to operating a successful business with efficient mechanics and satisfied customers. If you own an at-home repair shop in your garage, know when it’s time to replace or repair your tools.

Tire Changer Machine Maintenance & Repair

Tire changer machines are one of the most common pieces of wheel equipment. As such, when a tire changer machine stops working properly, auto shop efficiency plummets. Is your machine leaking water from hoses or the bead breaker cylinder? Are the cylinders working slowly? Are your foot pedal spool valves leaking, sticking, or simply not responding? Each of these common problems are signs that your tire changer machine requires repair.

Performing simple maintenance on your tire changer machine can prevent issues. A few practical steps to keep your equipment running properly in the long run include:

  • Ensure that your air compressor drains. Manually drain your air compressor every day or install a timed-release valve to regularly drain your tank.
  • Install a reliable air dryer after your compressor, ensuring that moisture stays out of the air lines.
  • Check oiler assemblies weekly, and fill when needed.

Simply put, wheel equipment requires regular maintenance and care to prolong life. The primary cause of tire changer machine issues stems from water leaking into the air lines and internal components. When this occurs, seals dry, and parts begin to fail.

While regular maintenance can prolong your tire changer’s lifetime, eventually parts will fail. Of course, down time in the auto repair industry can be detrimental to a business. If your shop utilizes any wheel equipment throughout daily operations, identifying a trustworthy wheel equipment repair parts company is crucial.

Replace Wheel Equipment Repair Parts

SVI International is an industry leader in repair parts, with a plethora of tire changer parts. Regardless of the make or model utilized in your shop, SVI can have or manufacture the proper equipment to efficiently resolve a repair. Below, we discuss a small sampling of SVI’s tire changer models. For every model, according to unique specifications, SVI carries mount/ demount heads, bead break seal kits, blast valves, and every other required part.

Coats Tire Changers

Coats, providing high-quality tire changers since 1947, provides a wide variety of tire changers, from the 10-10 Air-Flate to the 6050E. SVI provides repair parts for every model.

Focus Tire Changers

Focus offers tire changers for cars and heavy vehicles, innovative systems commonly found in auto repair shops. SVI readily supplies repair parts for four models: F21, F242 TI, F252 TI, and F28.

Atlas Tire Changers

Yet another well-known tire changer company, Atlas Automotive Equipment is found in many countries across the world. With competitive prices and superb quality, Atlas is a trustworthy brand. At SVI, we understand that the best automotive equipment is not easily or gladly replaced – thus, we carry repair parts for nine Atlas tire changer models: TC-221XL, TC-229, TC-289, TC-755, TC205, TC211, TC221, TTC-301, and TTC-303.

Tuxedo

Tuxedo Distributors offer tire changers for ATVs, motorcycles, cars, trucks, tractors, and earthmovers. SVI provides a broad collection of tire changer parts for eight primary models: TC-1300, TC-400M-B, TC-430, TC-530, TC-770-T, TC-950, TC-950-WPA, and TC-980.

As mentioned, the list above covers a fraction of the tire changer machine repair parts carried by SVI.

SVI International

At SVI International, we are dedicated to our clients. This is why we provide on-time delivery on in-stock parts, from any of our three, “ready ship” warehouses, located across the country.

If the tire changer you utilize is not covered in this content, you will likely find the correct machine while viewing our entire collection. Furthermore, our team is ready to assist you in your search for the proper repair parts! Please do not hesitate to reach out 800-321-8173. We’re always just a phone call away.

How to Lift a Motorcycle for Maintenance  

how to lift a motorcycle for maintenance

If you want a motorcycle to look and run its best and retain its value, you must take great care of it. While motorcycles require more frequent repair and maintenance than vehicles, the care is far less intimidating due to the motorcycle’s small size. 

If you plan to perform maintenance work on a motorcycle, you’ll want a motorcycle lift or jack. It increases work safety by keeping the bike off the ground, allowing you to maneuver around the bike, and preventing you from lying on the floor. 

Whether you’re a mechanic or a home motorcycle enthusiast, it’s crucial to understand how to lift a motorcycle for maintenance. 

How to Safely Lift Your Motorcycle

According to some estimates, the “typical” motorcycle weighs roughly 700 pounds, but this varies depending on the brand, engine size, and style.

While motorcycles are smaller and lighter than cars, a slight misstep with a motorcycle lift can cause significant injuries to you and the bike. 

It’s best to follow the steps below for how to lift a motorcycle for maintenance safely:

Prepare the Area

Ensure that the area where you are using the lift is flat. Not only that, but it’s essential to use a motorcycle lift on concrete, not carpet. If you use a lift on a carpeted floor, the lift can slip, causing the bike to fall. A fallen bike can cause severe injuries to you and the bike. 

In addition, keep the space surrounding the lift clutter-free to avoid any issues with your bike as it rises or falls. If you have a limited amount of room, the last thing you want is for an overloaded workbench to catch a handlebar and tip your lift over.

Check for the Best Lift Spots

Consult your bike’s manual to locate the best and most supporting spots for lifting. 

If you have a cruiser, you will benefit from frame rails. Frame rails will greatly simplify raising it with a jack and mounting it on jack stands. 

In addition, look for your frame sliders if you have a sports bike. 

Prepare the Bike 

To prepare the bike for lifting, use the center stand. A center stand will assist you with positioning your bike so the lifting process is safe and easy. 

If you only have a side stand, place it on top of a spare wood block or something similar before placing it down.

The jack should be as straight and upright as possible underneath your bike. 

Although some motorcycle lift tables include built-in rubber padding, many do not. Use a buffer against any areas that touch your bike to prevent scratches and paint damage. Use clean rags to protect the wheel mounts. In addition, it’s important to double-check that your tie-downs aren’t scratching against the bike’s body.

Start the Lift

Lift the bike carefully and evenly, and don’t be afraid to lower it and start over again if it’s not perfect the first time.

If your table doesn’t have built-in wheel clamps, you can install a wheel chock.

Place the Jack Stands

Before working on your bike, set up the jack stands. These are typically included with the lift or may be purchased separately.

Follow the instructions for your motorcycle’s jack stands to place them correctly.

Perform Maintenance

Congrats! You’ve used a jack to lift your bike off the ground, and it’s now ready for repairs or route maintenance.

How to Lift a Motorcycle Without a Lift

Without a motorcycle lift, you might easily harm the bike or yourself.

However, here are some options for lifting a motorcycle without a motorcycle lift:

Make Your Own Lift

If you don’t already have a manufactured lift, you can make a DIY lift with plenty of online do-it-yourself guides. The guides provide a list of materials to purchase at any construction supply store.

Use a Car Jack

If you don’t have a lift specifically for motorcycles, you can use a car jack.

Place a wooden block under your bike’s kickstand and place the car jack on the opposite side. Move the side stand forward to guarantee that the front wheel is well elevated off the ground.

When using a car jack, you need to be careful to lift from the frame (specifically the skid plate) and keep the kickstand down.

 Remember to never lift the bike with the jack under the exhaust system. The exhaust system is not designed to withstand the weight and may be crushed or damaged.

Use Wooden Boards

In a pinch, you can use wooden boards to prop up one side of your motorcycle at a time. Lifting your bike on a stack of wooden boards is a tried and true method for lifting one side of your bike at a time.

 The process is even more straightforward with two individuals; one lifts the bike’s rear end while the other slides the boards underneath.

After you’ve installed the boards, you should consider strapping the front end of your bike to keep it from tipping over.

Benefits of a Motorcycle Lift

When doing maintenance, safety should always come first. Motorcycle lift tables are extremely stable and safe because they are able to lift the entire motorcycle at once, rather than just the front of the back. While using a car jack is a possible secondary solution, it’s not nearly as easy or safe as a motorcycle lift.

With a motorcycle lift, the motorcycle remains upright, resting on the frame rather than the kickstand. Steel lifts are usually powered by air or hydraulic cylinders, allowing loads of up to 1500 pounds.

In short, motorcycle lifts are simple to use, inexpensive to own and take up little to no extra room, especially if you consider using them for bike storage.Should you have any questions about the type of lift you need for your bike, please contact us. We would love to work with you to find the best motorcycle jack for your purposes.