Common Bendpak Lift Problems and How to Solve Them

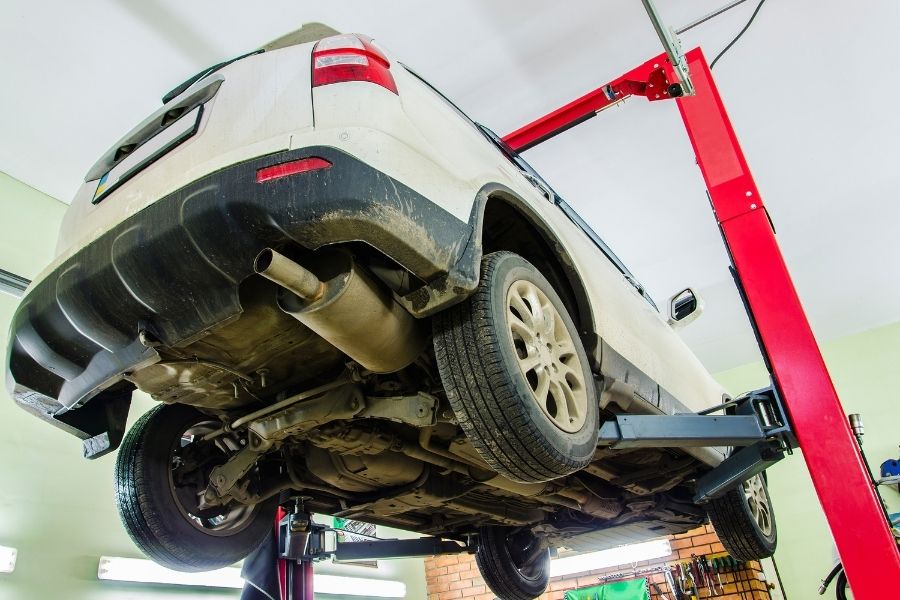
A Bendpak Lift is a popular sight in almost any mechanic shop. However, if your Bendpak lift malfunctions, serious problems can arise. Not only will a malfunctioning Bendpak lift cause your wallet to suffer due to the decrease in productivity, but also the risk of injury to you and your employees is a serious possibility.

The functioning of your Bendpak lift is critical. If you notice your Bendpak lift is not performing as it used to, stop and consider if one of the following common problems is the culprit behind your Bendpak lift’s malfunctioning. 

If you are experiencing one of these problems with your Bendpak lift, consider the accompanying solutions on how to fix the issue. Also, if any of your Bendpak lift parts need replacing, contact SVI International here so we can help you get your Bendpak lift back in top shape! 

Common Problems (and Solutions) with your Bendpak Lift 

One of the first common problems with your Bendpak lift is that it lowers more slowly than before. If you notice your Bendpak lift is lowering slower than usual, consider these common problems and their accompanying solutions: 

  1. Release valve is clogged: Your Bendpak may be lowering slower because the release valve is clogged. If this is the case, check the cleanliness and hydraulic fluid level. If you notice the hydraulic fluid is contaminated, and you are also using transmission fluid therein, you are going to need to clean and ultimately replace the entire system. 

First, clean the release valve in solvent. Next, utilize compressed air to blow out the valve thereafter. Finally, replace it with a new part to get your lift back into top shape.

2. Cylinders are binding: If you notice the cylinders on your Bendpak lift are binding, contact customer support immediately to get the issue addressed. 

3. Pressure fitting is too long: If the pressure fitting is too long, this can also cause your Bendpak lift to lower more slowly. To remedy this issue, replace the current fitting on your Bendpak lift with a shorter thread lead. 

The second common problem you may have with your Bendpak lift is that your lift will not rise up. If this occurs with your lift, check out these common problems that can cause the lift not to raise, and their accompanied solutions: 

  1. Relief valve is leaking: If the relief valve is leaking, you are going to need to replace the old valve with a new valve to stop the leakage.

2. Air inside the oil: Having air inside the oil can cause your Bendpak lift to not rise. To see if there is air inside the oil, first check for the proper oil level. Next, bleed the sealers and check to see if the oil seal is damaged or cocked. 

If the oil seal is damaged, you will need to replace the seal. If the oil seal is not damaged, next check the inlet screen. A dirty inlet screen can also result in air getting inside the oil. Thus, if the inlet screen is clogged, you will need to clean or replace it.

3. Pump is damaged: If the pump on your Bendpak lift is damaged, the lift will not rise effectively, or at all. If this is the case, you need to replace the pump with a new one.

4, Leaks in the lowering valves: To solve a leaking lowering valve, first you need to remove all possible contamination from the valve. Next, follow the owner’s manual which accompanied your pump to replace the dirty oil. 

If the handle is not able to move smoothly after you complete these steps, you will need to purchase a new bracket or handle assembly to replace the old one.

5. Pump will not prime: If your pump will not prime, first check the oil level. If the oil level is normal, you will need to flush the release valve and remove any and all possible contamination. Next, check to see if the oil seal is damaged or cocked. If the oil seal was damaged, you will need to replace it with a new part. 

If the oil seal was not damaged, ensure the pump mounting bolts are correct by referring to your owner’s manual. If the mounting bolts are correct, next check the inlet screen, If the inlet screen is clogged, you will need to clean or replace it. Finally, if the inlet screen was not clogged, you will need to purchase a new pump. 

If after you have followed all the proper operating procedures, and all mechanical locks have been released, but the vehicle still becomes stranded in the air, stop your work immediately. This can be a sign of a serious safety situation and you should not continue to use, or try to fix the lift, without having a clear direction. First, make sure the locking positions are secure, and then contact your Bendpak lift’s factory for directions on how to proceed. 

If your Bendpak lift stops working correctly, you need to know how to solve the common problems that can be the source of the malfunction.  A malfunctioning lift will not only slow down productivity and cost you money, but also can result in bodily injury if not remedied quickly. 

For all your Bendpak lift needs, we at SVI are here to help. With our massive inventory consisting of three different warehouses and fifty different product lines, we can supply you with the part you need to fix your lift quickly and efficiently. Not only do we carry the parts you need for your Bendpak lift, but we also can create custom parts for your lift! 

Call us today at 1 (800) 321-8173 or stop by our office to pick up your Bendpak lift part today!

How to Find Jack Points On a Car

When it comes to cars, we are all focused on safety.  Whether it is wearing a safety belt, stopping for a red light, following the speed limit, or having your car tell you when to “BRAKE” if you are about to hit an object, our society works to makes sure cars are safe for both the driver and those around the vehicle. 

As with any activity dealing with a car, fixing a car also requires safety precautions. Generally, to fix a car you need to elevate the car to be able to work on the car’s undercarriage. To lift a car, you will encounter what is an all-too-common sight in any mechanic shop: a two-post lift.  Specific safety precautions apply to a two-post lift, such that, if a vehicle were to fall off of a lift, the fall likely was a result of user error, and likely could have been prevented. 

The Different Types of Two Post Car Lifts              

To start, a two-post list engages the frame of a vehicle to hoist the vehicle into the air. There are three common types of two-post lifts that are used within mechanic shops: symmetrical, asymmetrical, or versymmetrical.

  • Symmetrical: a symmetrical two-post lift is likely the easiest to identify.  With a symmetrical two-post lift, the arms of each lift face each other such that each arm bears 50% of the load.
  • Asymmetrical: an asymmetrical two-post lift, these lifts have arms that are able to swing, but the front and back arms are not the same length.
  • Versymmetrical: a versymmetrical two-post lift allows users to utilize the benefits of a symmetrical and asymmetrical lift at the same time. 

When lifting a vehicle with a symmetrical, an asymmetrical, or a versymmetrical two-post lift, it is important to know how to locate the lift point of a vehicle. 

BendPak reported that accidents resulted from two-post lifts when the vehicle was not properly placed upon the lift: “Vehicles topple or slide off lifts when users don’t adhere to one or more of the following crucial procedures: setting the vehicle at the proper lifting points; installing the wrong lift adapters; using adjustable adapters in the wrong fashion; neglecting to account for the vehicle’s center of gravity.” 

How to Find Lift Points on a Car 

In order to make sure both you and your vehicle stay safe while using a two-point lift, we recommend following the below instructions and suggestions while operating a two-post lift. 

First and foremost, when operating a two-post lift, you need to know where the vehicle’s center of gravity is. Please take note that the center of gravity is not necessarily the center of the vehicle. Eyeballing the vehicle and attempting to guess where the center of gravity is without truly knowing can result in harm to the lift, the vehicle, or even yourself. Thus, when we say, “center of gravity,” we are referring to the location between the front and back wheels where the weight of the vehicle is evenly distributed. 

The center of gravity varies depending on what type of vehicle you are working with and what model the vehicle is. For instance, the center of gravity on front-wheel-drive cars is slightly in front of the driver’s seat; while, in contrast, the center of gravity on rear-wheel-drive cars is below the driver’s seat. 

As a simple solution, locate the vehicle’s car manual from the manufacturer and follow the stated lift points therein. If the car manual does not state where the lift points are located on the vehicle, you can call the maker of the vehicle’s customer service line. Alternatively, the internet offers an abundance of research; do some in-depth digging on the make and model of the vehicle you will be working on to find the vehicle’s lift points. 

Furthermore, if you’re wondering how to find jack points on a car, you can make use of vehicle lifting guides. These guides will help you identify the specific lifting points on your car where you can safely and effectively place a jack for maintenance or repairs. The Automotive Lift Institute produces such a manual. According to Automotive Lift Institute, their manual is “updated annually to provide the manufacturer-recommended lifting points on thousands of domestic and imported cars, SUVs, vans and light trucks sold in the United States and Canada.” Automotive Lift Institute’s current manual covers vehicles from 2000 through 2022. Click here for more information on how to purchase this manual. 

If the car’s manual, the car manufacturer’s call center, the internet, or another manual does not help you find the car’s lift points, you can always measure for the center of gravity and determine where the lifting points can be found. 

To locate the lifting points for a single axle vehicle, utilize the following steps: 

  1. Figure out the gross weight of the vehicle
  2. Determine the rear and front axle weights
  3. Plug those numbers into this formula: (Front axle weight x distance from RDL to front axle) + (Rear axle weight x distance from RDL to rear axle) = total moment
  4. Divide the total moment derived from the formula above by the gross weight of the vehicle, this will give you the center of balance for the vehicle 

Whenever you are driving a vehicle, it is important you use undertake safety precautions. Likewise, whenever you are working on a vehicle, it is equally as important you undertake all safety precautions. When operating a two-post lift, it is paramount to your lift’s safety, your workspace’s safety, and the vehicle’s safety that you make sure the proper lifting points are being utilized. By following these above steps, you can make sure both your lift and the vehicle, do not sustain any damage.

SVI International: Your Solution for Car Lifts and Lift Parts

If ever in doubt about what kind of lift or lift parts you need to complete a maintenance repair on your vehicles, SVI International is always here to help. As a leader in repair parts for automotive lifts, you can always expect prompt delivery from one of our three warehouses across the United States. Reach out to us at (800) 321-8173 or complete our online contact form. Browse our selection of lift accessories and supplies or reach out if you are in need of something custom for your space!