Air Compressor Oil Type: Which Should You Use? 

Air compressor leaking oil

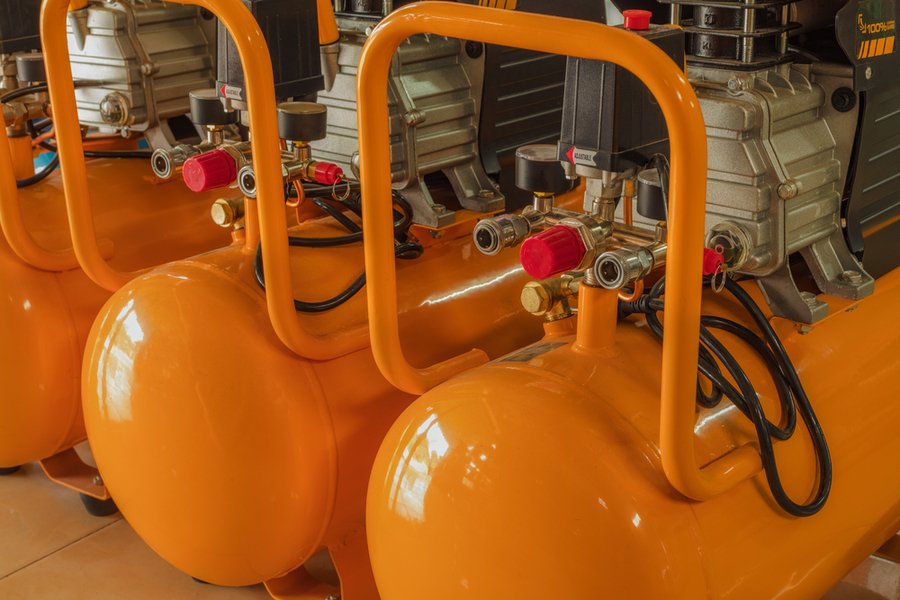
An air compressor is a valuable tool that can be used to fill gas cylinders, power pneumatic tools, fill high-pressure air tanks and tires, and more. These devices, which are made by various manufacturers and in varying types and sizes, can last for up to 28 years if properly maintained, oiled, and cleaned. Following is a comprehensive overview of everything you need to know about choosing the right air compressor oil type.

Why Does My Air Compressor Need Oil?

If your air compressor isn’t an oil-free model, it will need air compressor oil periodically in order to work properly. Air compressors need oil to cool and lubricate the compressor. Air compressor oil prevents overheating and acts as a sealant to prevent leaks. It also lubricates moving parts to keep the device running smoothly. You should change the oil for an air compressor every 500 to 1,000 hours of run time.

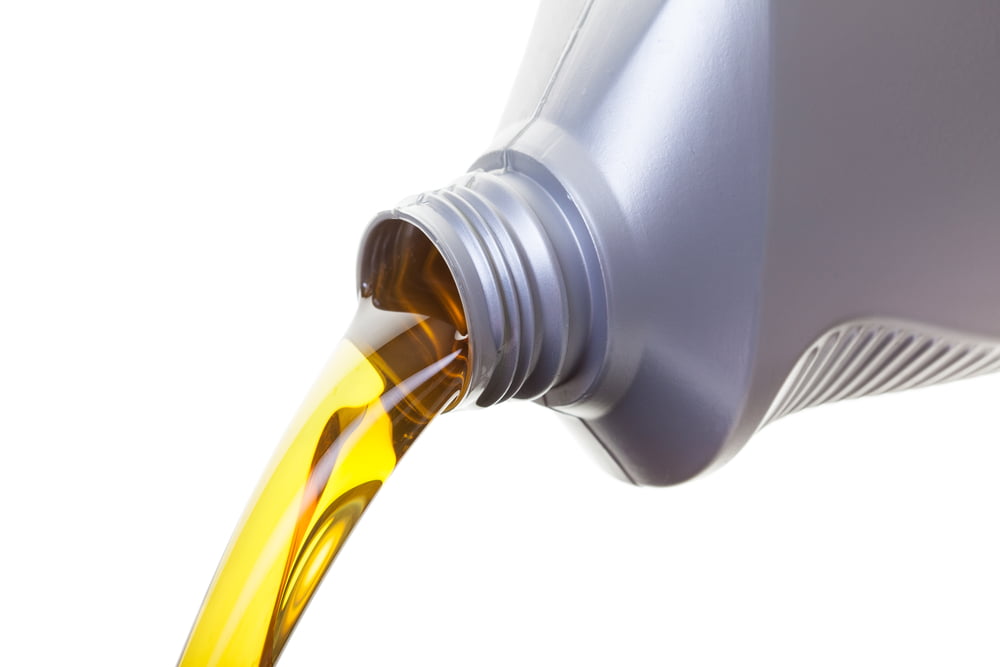
Standard vs Synthetic Air Compressor Oil

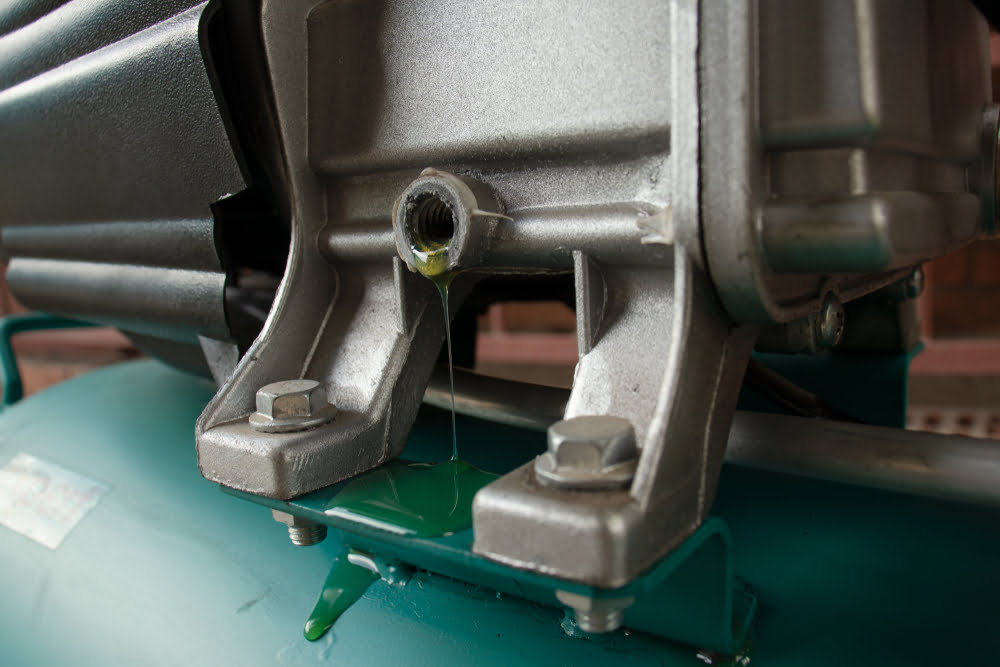
There are two main types of oil for an air compressor. These are standard oil and synthetic oil. You can use either type of oil unless the manufacturer has indicated otherwise. Both types of oil need to be stored in a sealed container in a cool, dry location to prevent spoilage. If standard or synthetic oil spills when you change your compressor oil, you’ll want to clean up the spill right away to prevent damage to your garage flooring.

Even so, there are some important differences between standard and synthetic oil. Understanding the pros and cons of each type, and when and how to use them, will help you keep your air compressor in good working order long-term.

Standard / Mineral Oil

Standard oil, also known as mineral oil, costs less than synthetic oil. Thus, many businesses that use air compressors use this type of oil to keep operating costs low. However, it’s important to bear in mind that it’s not suitable for all environments. If your shop is located in an area that gets very hot in the summer or cold in the winter, this oil won’t perform well. What’s more, air compressors that use standard oil need more frequent oil changes than compressors that use synthetic oil. Even so, standard oil offers enough lubrication and protection to keep your air compressor running smoothly for as long as necessary.

Synthetic Oil

Synthetic lubricants aren’t as flammable as standard ones. What’s more, they perform well even in extreme temperatures. They’re energy efficient and their high resistance to oxidation decreases the number of oil changes the air compressor will need. If you want to keep your air compressor in optimal shape and be able to run it continually without stopping to maintain it, synthetic oil is your best bet. It costs more than standard oil, but it’s an investment well worth making if you’re able to do so.

synthetic oil for an air compressor

Substitutes for Air Compressor Oil

Air compressor oil is always the best option for your air compressor. However, if you’re in a pinch, you can use either hydraulic oil or automatic transmission fluid (ATF). However, these won’t work well for all compressors and may only work under certain circumstances. Hydraulic oil, for instance, has a high viscosity. You can use it for your air compressor when temperatures are low, but you may want to avoid doing so on a hot summer day. Not all automatic transmission fluids are compatible with all air compressor types. This means you’ll need to study the specs on the bottle before using an ATF for your compressor.

What Happens if I Use the Wrong Oil?

Using the wrong type of oil will decrease the lifespan of your air compressor. Automotive engine oil, for instance, has detergents and additives that can put a strain on your air compressor air pump. Some alternative oils have detergents that create foam in the pump and wear out your air compressor. If the oil isn’t viscous enough, your air compressor won’t run as it should.

Do All Air Compressors Require Oil?

Some air compressors can be lubricated without oil. These are called oil-free air compressors. However, they’re not typically used in professional settings. If your air compressor isn’t labeled as being oil-free, the odds are it needs oil.

Timeline for Air Compressor Maintenance Needs

wrench closing oil valve on an air compressor after changing air compressor oil

Check your air compressor for leaks every single day. You’ll also want to tighten electrical connectors and inspect hoses daily. Drain liquid accumulated in the tank using a waste oil strainer to prevent spills. Clean external components and check your air filters and oil levels every single week.

You’ll need to change the oil and air filters every month. You may also want to test the air compressor’s safety mechanisms and change the oil separator monthly.

The fuel tank and grease motor bearings should be checked once every three to six months, depending on the type of air compressor you use and how often you use it. Belts should be replaced at least a year, and you may need to replace hoses and connectors yearly as well.

SVI for all Your Air Compressor Part Replacement Needs

Spending time maintaining your air compressor and ensuring it has enough oil to run smoothly will lengthen the air compressor’s lifespan, saving you time and hassle long-term. However, even a high-quality air compressor that’s been properly cared for will occasionally break down and need replacement parts. Sometimes, this happens with little or no warning, especially if you’ve been using the air compressor a lot and/or have been working in extreme weather.

SVI is the ideal one-stop-shop for air compressor parts. The company offers a huge selection of parts for different air compressor models, making it easy for you to find what you’re looking for right when you need it. We have two ready-to-ship warehouses in different areas of the United States to ensure you get the parts you need as quickly as possible. Get in touch with us to find out more about what we offer or to request a free quote for one or more air compressor components.

Guide to How to Install a Car Lift

mechanic standing next to a newly added car lift

Installing a car lift on your own is no small matter. If you aren’t entirely confident that you know how to install a car lift safely, you may want to call a professional service to do the job for you. On the other hand, if you have a lot of experience in the auto repair industry, you may find that installing a lift without professional assistance can save you a significant amount of money.

Start by making sure you have the right tools, clothing, and protective gear for the job. You’ll also need at least one other person to help you lift heavy parts. Next, follow the guidelines outlined below to ensure your new lift is properly installed and ready to use.

Choose the Proper Location to Install a Car Lift

The first step in how to install a car lift is to choose a convenient location, so mechanics can walk and work under vehicles with ease. The usual minimum clearance height is 12 feet from the floor to the ceiling. Lifts with asymmetric arms should be at least nine feet from a wall. If you intend to install more than one lift, make sure there is ample space between each lift for mechanics to move around safely and conveniently.

What to Plan for Before You Install a Car Lift

It’s wise to check local building codes before you buy a lift as your geographic location, size, and height of your shop, and other factors may determine which type (or types) of lift you can install and where you can install it. You’ll also want to have all the tools and equipment you need for the job on hand to prevent accidents and speed up the installation process.

The Different Lift Options

Two-Post Lift

Two-post lifts are small yet durable. They’re also more affordable than four-post lifts. Two-post lifts typically have a 220-volt motor and can be used to repair a range of vehicle makes and models. These lifts must be fastened securely to the ground and cannot be moved.

Four- Post Lift

Four-post lifts have a 110-volt motor and are more expensive than two-post lifts. However, unlike two-post lifts, four-post lifts do not necessarily have to be fastened permanently to the ground. This enables auto shop owners to move the lift as the need arises. The only downside of the four-post lift is that it can only be used in a shop with a high ceiling.

Midrise/Scissor Lift

There are also multiple scissor lifts to pick from. Options include the electric lift, rough terrain lift, and the hybrid lift. Some lifts are low-rise, others are mid-rise, and still others are full-rise. No one scissor lift type is inherently better than the others; rather, you will need to consider product specs such as load, lift size, and platform size to pick the lift that best suits your needs. Bear in mind, however, that these lifts have a lower weight limit and shorter life span than two-post and four-post lifts.

Prepare the Concrete Floor

A car lift should only be installed on a solid concrete surface. The surface should be at least four inches deep, but six to twelve inches is ideal. The concrete should be mixed mechanically rather than by hand, and it will need a minimum PSI of 3,0000.

Anchor the Lift to the Floor

Read the installation instructions carefully before starting, so you know the area of the lift and how far apart the lift towers are supposed to be. Mark the concrete to show where to drill each hole. However, you should only drill the holes for a single tower at a time. Once you’ve put in the anchors for the first tower, proceed to put in the anchors for the second tower, making sure that it’s directly opposite the first set of anchors you installed. Continue this process until all anchors are securely installed in the concrete.

Assemble the Lift Components

Generally speaking, you’ll start by installing the first tower and then allow time for the adhesive to cure. Next, you’ll assemble and install the overhead bar. This includes attaching wiring to the bar and securing the limit switch arm. You’ll need two people to carry the overhead bar up two ladders and secure it in place. Once you’re done, you’ll install the other towers. Once all the towers are set up and the adhesive has cured, two people should install the power unit.

Install Cables, Lines, & Hoses

Now it’s time to install the hydraulic lines, hydraulic fittings, and the wire for the safety shut-off switch. If there is extra hydraulic line material, tie it up at the top of the lift to ensure it doesn’t bunch up inside the towers and interfere with lift operations. When you’re done, run the wire from the safety switch to the power unit. Finally, install the equilibrium cables, using two nuts on each end of both cables to lock them in place.

Install the Lift Arms

Hang the lift arms onto the carriage, then drop the lifting feet into the arms. Install arm restraints to prevent the arms from swinging too far to the left or right. Be sure the spring, washer, and cotter pin are also properly installed. When you’re done, connect the hydraulic line and fill the power unit reservoir with the fluid recommended in your car lift manual.

Test the Lift with a Load Test

Clear the area to ensure no one is hurt if the lift malfunctions. Then test the lift with a load test.

Obtain a Professional Technician to Help

Have a professional technician check the lift immediately after installation and at the end of each workday. This ensures the lift is in good working order and helps to prevent serious damage and accidents.

Conduct Regular Maintenance & Repairs

Keeping your lift in good working order is a breeze when you partner with SVI. We offer over 15,000 auto lift and vehicle shop repair parts to make it easy for you to find any part you need. We have new auto lifts in stock if your old lift needs to be replaced, or you need to add one or more new lifts to your shop. Our two ready-ship warehouses offer same-day shipping on in-stock items to ensure you get the parts you need without delay. Contact us for more information or to get a custom quote on your order.

How Air Compressors Work: The Basics

air compressors

Air compressors play a vital role in any auto shop. They’re multifaceted tools with a host of functions and learning how to use an air compressor properly can save you a lot of time and hassle.

What is an Air Compressor Used For?

Air compressors can be used for welding, plasma cutting, pneumatic robot operation, and tire inflation. They help drive machines that lift, move, position, and fasten vehicle parts. Air compressors are also useful for body painting, high-pressure cleaning, and washing.

How Do Air Compressors Work?

How does an air compressor work? An air compressor pushes air into a container, pressurizes it, and then pushes it through an opening where it builds up until it’s ready to be used. When air is released, the energy from the pressurized air changes into kinetic energy that can power a range of tools.

What Is Air Displacement?

Now that the question of “how does an air compressor work?” has been answered, it’s time to cover air displacement. This is the measure used to determine the volume of air a compressor can move in a single stroke. It’s measured in cubic feet per minute (CFM) or liters per second (l/s).

To find the air displacement level of your compressor, multiply your air compressor’s tank size by the maximum PSI on your tank’s gauge to find the tank’s size in cubic inches. Next, divide the product by 1,728. Your answer is your compressor’s CFM rating.

Types of Air Displacement and How They Work

Air compressors fall under two main categories. These are positive displacement air compressors and dynamic (also known as non-positive) displacement air compressors.

Positive Displacement

Positive displacement air compressors work by forcing air into a chamber. The chamber then gets smaller, which decreases air volume and compresses the air. Piston, scroll, and rotary vane air compressors are all positive displacement air compressors. Positive displacement air compressors are the ones typically used in auto shops.

Dynamic (non-positive) Displacement

Dynamic displacement air compressors have a rotating blade that generates airflow, which is then restricted to create pressurized air. Axial and centrifugal air compressors are both dynamic air compressors. Dynamic air compressors are typically found at manufacturing and chemical plants.

Single Stage vs Two Stage

There are two types of piston air compressors. These are single-stage and two-stage.

Single-stage air compressors compress air on one side of the piston. The air is only compressed once, after which it is delivered to the tank, where it’s held until it needs to be used. These air compressors are one of the more affordable options and are commonly used by most auto mechanic shops.

Two-stage air compressors compress air twice. The air is compressed once before it moves into the tank. In the tank, the air is cooled and compressed again. Two-stage air compressors tend to have higher air pressure levels than single-stage air compressors.

Components of an Air Compressor

All makes and models of air compressors have the same basic parts. One of the most important parts is the electric motor. The motor powers the device to enable it to compress air and then release the compressed air as needed. The pump pressurizes the air before sending it to the storage tank. The storage tank stores the compressed air until it’s ready to be used.

The pressure switch controls the motor and will shut the motor off automatically if the air pressure in the tank reaches its limit. The intake filter prevents dirt and debris from entering the compressor while the exit filter cleans the compressed air as it leaves the tank. Pressure gauges on the air compressor will help you see the pressure levels of the air inside the tank and the air coming out of the air hose.

Air compressor parts need regular maintenance so the device will work properly. If parts become worn, you should replace them right away to prevent damage to the entire machine. A broken tank is best replaced rather than repaired, and it’s important to choose a tank with care to ensure it’s the right size, air pressure rating, and horsepower rating for your device. You’ll also want to choose filters with care to ensure they’ll meet your exact needs. Take your shop environment, air compressor operating temperatures, pressure drop, and other factors into account to ensure the filters will be able to keep the air compressor and compressed air clean and particle-free at all times.

How Lubrication Works in Air Compressors

Lubricated air compressors need oil to keep all moving parts working properly. How the oil is distributed varies depending on the compressor type, but most lubricated air compressors store oil in a reservoir. This oil is then drawn via pumps to feed the various compressor components. Once the oil has lubricated the compressor, it drains back into the reservoir.

Oil-free air compressors, on the other hand, may use water in place of oil to keep the compressor running as it should. However, some models need no lubrication as they are designed to prevent metal parts from coming in contact with other metal parts.

Air Compressor Power Ratings

Experts use three main ratings to determine an air compressor’s power levels. CFM shows how much air a compressor can produce. PSI, which stands for pounds per square inch, indicates the amount of force the device can deliver. Horsepower (HP) measures the amount of work your compressor’s motor can perform.

SVI: The Leading Air Compressor Parts Provider

Keeping your air compressor running smoothly prevents delays and enables you to do your job faster and more easily than would otherwise be possible. That’s why it’s important to work with a reliable parts supplier that can provide the exact components you need to keep your air compressor in tip-top shape at all times. SVI International has over 40,000 products for sale and two ready-ship warehouses offering same-day shipping to ensure all orders are processed without undue delay. Contact us to find out more about our products and services, or to place an order for the air compressor parts of your choice.