How to Use an Air Compressor to Spray Paint

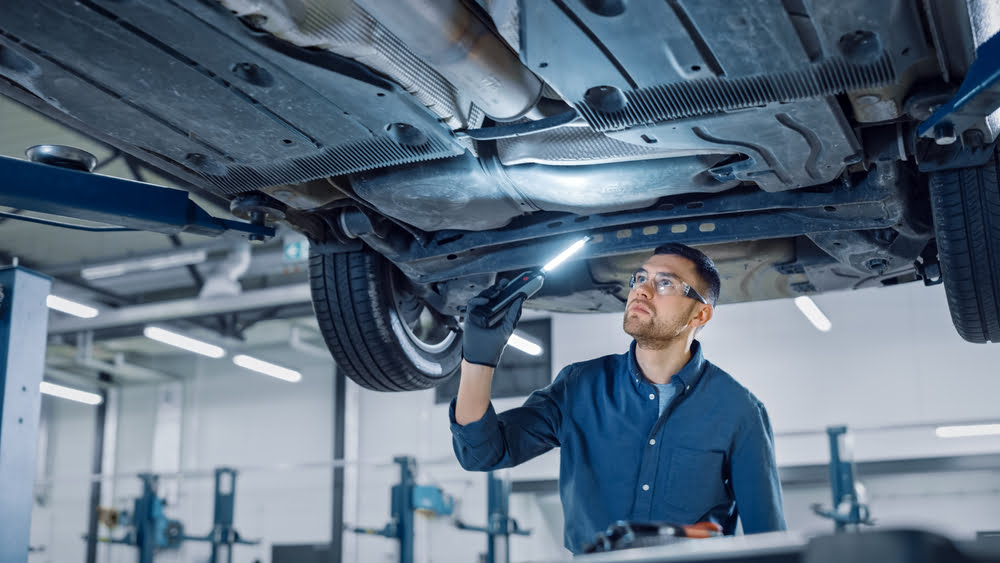
Whether you’re dealing with rust, peeling paint, or blemishes on your car, all you need is a proper workspace and the appropriate tools to paint the vehicle. In addition to needing a paint sprayer, power sander, quality paint, and other painting supplies, you’ll need an air compressor to power the sprayer. So, regardless of whether you’re a body shop mechanic or a car hobbyist looking to do some paint work, you’re going to need to know how to set up an air compressor properly.

How Do Air Compressors Work?

Air compressors are a reasonably simple machine for the versatility that they provide. They work by pushing air into a container and then pressurizing it. Then the pressurized air goes through an opening where it builds up. That built-up air is used to power a variety of tools, including sanders and paint sprayers.

Air compressors have an engine that changes electrical energy into kinetic energy, similar to a combustion engine. They use the same parts, including a crankshaft, piston, valve, head, and connecting rod.

They can deliver pressurized air in a strong enough flow that the automotive paint turns into a fine particulate, ideal for an even coat.

Can You Use an Air Compressor for Painting Cars?

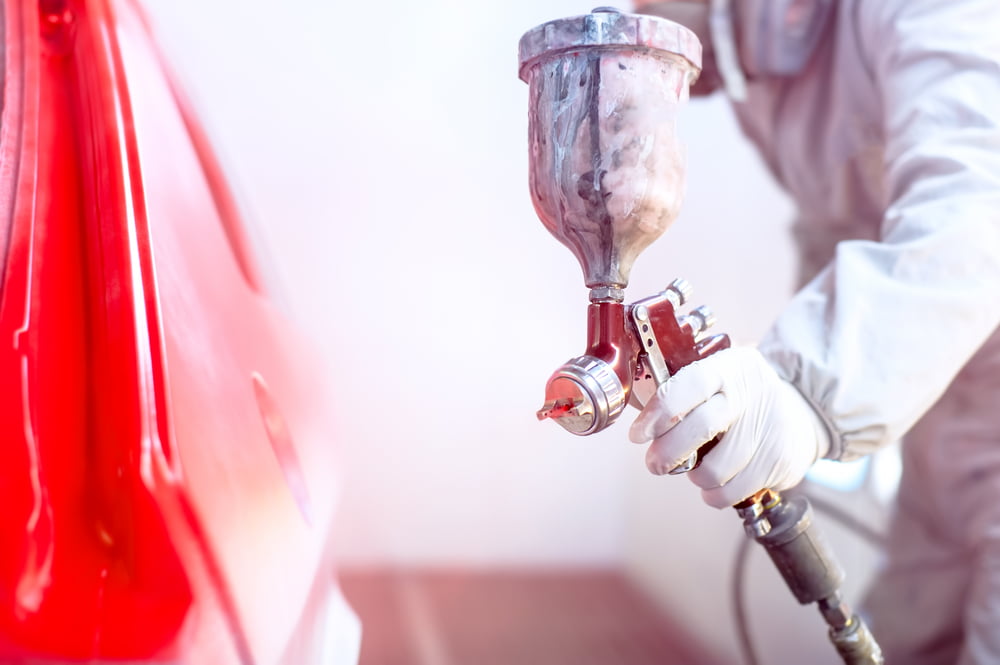
Using an air compressor for painting cars is not just feasible but highly recommended. This tool is ideal if you’re after a smooth finish. Nonetheless, you have to choose an air compressor with care to ensure you’re using the right one for the paint job at hand.

How to Set Up an Air Compressor to Spray Paint a Car

Step 1:

Before starting anything, apply proper safety gear. 

Step 2:

Connect your air compressor hose to the paint spray gun.

Step 3:

Double-check that the air compressor is delivering satisfactory CFM. 

Step 4:

Mix your paint using the recommended proportions. 

Step 5:

Test the pressure of your paint sprayer on a piece of cardboard to ensure it delivers a consistent flow of paint. If you are using an HVLP spray gun, you can use the knob on the side to adjust the spray pattern.

Step 6:

Carefully apply the first coat of paint to the vehicle’s surface. 

Step 7:

Wait 12-24 hours to apply a second coat (if required).

Which Air Compressor to Get for Spray Painting Cars

Air compressors come in many sizes and models. Getting to know your options will help you pick the best tool or tools for your shop.

Types of Air Compressors

Single vs. Two-Stage

Single-stage air compressors are best used for low-demand applications. While you can use one for painting a car, it’s not ideal. Your best option is to buy a two-stage air compressor with 90 PSI that can spray at least 20 cubic feet per minute (CFM).

Reciprocating Air vs. Rotary Screw vs. Centrifugal Compressors

Reciprocating air compressors have a long life span and deliver plenty of air per horsepower. The downside is that they need regular maintenance, including oil filter changes, oil/air separator changes, and valve and piston maintenance. Rotary screw air compressors, on the other hand, only need minimal maintenance. However, they aren’t as efficient as reciprocating air compressors.

Centrifugal compressors are a powerful and efficient option to consider. Like rotary compressors, they don’t need extensive care and maintenance. However, bear in mind that choke and surge can occur at both ends of the performance curve.

Considerations for an Air Compressor

While there are differences between the three types of compressors, it’s most important to focus on how a compressor tolerates air displacement.

If you’re looking to use an air compressor for painting a vehicle, you’ll want to consider a few things.

For example, if you are doing touch-up work, your compressor needs will be different than if you are repainting the entire vehicle. In addition, what is your space availability? What other tools will you be using your compressor for?

The following considerations will help you determine what air compressor is best for you when learning how to use an air compressor to spray paint.

Tank size

The size of your air compressor’s tank is probably the most critical factor in deciding which compressor is best. The proper size tank will make your job extremely efficient. 

If you want to paint an entire vehicle without refilling, a tank size of 50-60 gallons is recommended.

If you choose a smaller tank, you will need to refill it, sometimes more than once, if you are painting the entire vehicle. Smaller tanks also have more variability in the paint flow, so they can cause uneven coats. Lastly, you may have problems with the condensation of the paint with a smaller air compressor. This condensation happens because a smaller tank gets warm inside from constantly running and forms moisture as a result. 

However, if you are concerned about space in your garage, you may want to consider a turbine-style spray paint gun. While not as effective as a 50-60 gallon compressor, the turbine-style paint gun is small and has built-in compressors.

CFM (Cubic feet per minute) rating

CFM is the amount of air per minute that the compressor pushes out, so a higher CFM makes spray painting more efficient. A higher CFM will also ensure that the paint is evenly applied and the final coat is uniform.

Your air compressor needs to have a higher CFM than your paint sprayer, so typically you’ll want a value between 14-18 CFM.

Air pressure

Air pressure (psi) is how much pressure is applied to the air coming out of the compressor. However, PSI is less important than CFM in painting cars.

The CFM is more vital because it delivers the proper paint atomization, while the pressure of the paint is not as crucial.

Many people use a stronger PSI when applying the clear coat, such as 20-25 PSI. However, the base coat PSI should be around 10-15.

Many people find that a high-volume (high CFM), low-pressure (low PSI) compressor, also called HVLP, is a good air compressor choice when you need to complete a paint job. HVLP compressors that deliver close to 20 CFM are best.

Horsepower

While not as crucial as tank size, CFM, or PSI, horsepower should still play a part in your decision. The higher the horsepower is, the more tools it can power simultaneously. 

While most air compressors have a range between 1.5-6.5HP, some large standalone compressors go up to 15HP. 

For optimal performance, a 3-6HP compressor is best.

Additional Air Compressor Parts To Consider for Optimal Spray Painting

Even a good air compressor may not come with the right parts for a spray-painting job. Before you start, it’s wise to stock up on needed parts ahead of time to avoid job delays.

A 50- to 60-liter tank is ideal if you want to paint an entire vehicle without pausing to refill the tank. You may need more than one type of compressor to handle different types of paints, as acrylics and lacquers have different atomization requirements. What’s more, you’ll want to keep air compressor parts on hand as filters and other parts must be replaced regularly. A high pressure air line is also a must.

SVI: The Leading Air Compressor Parts Provider

SVI offers a huge selection of air compressor parts along with all the other equipment and spare parts you’ll need to keep your auto shop running smoothly long-term. We have two ready-ship warehouses to ensure you get your orders without undue delay and our team offers unbeatable customer service to help you find the right tools and parts for your shop. Get in touch with us to find out more or to place an order for the items of your choice.

The recommended tank size for painting an entire vehicle is 50-60 gallons. In addition, look for an air compressor with close to 20 CFM and a PSI that ranges from 10-25. Finally, while horsepower is the least important of the factors, you’ll want an air compressor with a range of 3-6HP.

If you have any questions about your current air compressor and any repair parts, please don’t hesitate to contact us. As the leading supplier of industrial parts, including air compressors, we can get you back to business in no time. We offer parts ranging from air compressor controls, hose reels, pressure gauges, and replacement tanks. We look forward to helping you get back on your feet as soon as possible!

Top 5 Auto Lift Maintenance Tips

Man working on car lift

If you have a car lift, you know how beneficial it is for car maintenance, storage, and overall safety. Whether in your home garage or auto mechanic’s shop, it’s likely your most valuable tool.

However, while many use the lift to perform vehicle maintenance, they don’t consider the need for regular maintenance on their car lifts.

It’s vital to perform regular lift maintenance, regardless of whether you’re lifting city buses or lifting ATVs. Otherwise, the car lift may malfunction, causing possible damage to the car and injury to you or your employees.

If you have a scissor lift, two-post lift, four-post lift, or in-ground lift, you need to perform routine lift maintenance for your employees’ safety and the vehicle’s protection.

Follow the top 5 maintenance tips below to keep your lift running smoothly. However, not all of these items will apply to your specific lift, so it’s a good idea to check your manufacturer’s manual for specific maintenance requirements.

1. Check the Lift’s Hydraulic System

The first thing you need to do is double-check the weight capacity of the auto lift. Make sure that you or your employees know the weight capacity and that you don’t attempt to lift a vehicle beyond the lift’s capacity.

Checking the hydraulic system includes a few things, such as checking the oil level and inspecting for leaks. If the lift needs additional oil, it’s an excellent time to add it.

In addition, you need to check for oil leaks, especially if you’ve noticed quickly falling oil levels, poor performance, or noticeable oil leakage under the lift.

You can quickly fix oil leaks by tightening fittings and couplings. However, if you have damaged hoses or seals, they will need replacing immediately.

Also, check the valves, hoses, and the hydraulic system’s overall function.

2. Check Chains, Cables, Pulleys, Spindles, and V-belts

When checking your chains and cables, the first thing is to ensure the chains, cables, and pulleys are adequately lubricated or greased.

In addition, you may need to adjust your cables because, over time, cables stretch. The lift may rise unevenly if a cable is not the proper length. Further, stretched cables can cause wear on other moving parts, such as the pulleys and shafts.

Also, once adjusted, ensure that your cables don’t move more than 1/2 an inch for two-post or four-post lifts.

Also, check for excess wear of chains, cables, pulleys, spindles, and v-belts. If anything needs replacing, it’s an excellent time to take care of that. 

You need to replace cables every 4-5 years. First, however, you should have the cable replaced if you see or notice:

  • three or more broken wires in one strand
  • rusting or corrosion on the wires
  • a cable core protruding
  • any other abnormality

If abnormalities are found, shut down the lift immediately until the cables are replaced. Do not use your lift with any cables in question.

3. Check Columns, Posts, and Rolling Bridge

It’s essential to check for rust, damage, or wear and tear on your lift, especially the columns, posts, or rolling bridge. 

Make sure to lubricate the necessary points on your columns.

You also want to check the alignment and ensure everything is set up correctly and in line. 

Check for leaks on the rolling bridge and test the locks and rollers.

4. Check Electrical

While it may seem obvious, don’t forget to check the switches on the lift to ensure that they work appropriately and that the terminals are in good shape. 

You’ll also want to check the limit switch for functionality, as a broken switch could allow your vehicle to run through the overhead beam on a two-post lift.

5. Check Overall Lift 

In addition to checking the electrical and hydraulic systems and the columns, cables, and chains, you’ll need to inspect the overall lift. 

Removing accumulated dirt, grease, or grime from your lift is essential to having a safe car lift.

Testing your lift is vital to ensure that all functions (top, bottom, full stop) work. 

Ensure your lift’s decking and covers are secured, if applicable.

A loose anchor bolt could cause tremendous issues with your lift, so it’s imperative to ensure that the anchor bolts and other fasteners are tightened. Also, check the floor around the anchor bolts to see any cracks. If you have cracks near the bolts, you need to have an expert check out your lift immediately. While it may not be an issue, safety is of the utmost importance.

It’s critical to make sure that the swing arm restraints and telescoping stops are in working order, as they prevent the vehicle from rolling off the car lift when it’s lifted.

While you can take care of many maintenance tasks related to your car lift, some things should be left to a professional, including replacing hydraulic hoses, chains, rollers, cables, and sheaves. In addition, rebuilding or replacing hydraulic cylinders, pumps, or motors should be done by an expert.

Maintaining your lift is just as valuable as the lift itself. The lift can malfunction without proper maintenance, causing severe damage to the vehicle and injury to the lift operator.

All lifts are different, however, so not all of these tips will apply to your specific car lift. If you are unsure about maintenance on your lift, it’s a good idea to check your manufacturer’s manual.

Hopefully, this thorough guide has helped you learn how to do lift maintenance. Whether you’re an individual car hobbyist that uses car lifts to maintain and store your vehicle or a mechanic who uses lifts all day, SVI can help you.

We sell everything from new automotive lifts to components such as cables, pulleys, and hydraulic cylinders. So if you are an individual needing help finding the right part for your lift, or a mechanic who needs a rare accessory, we can help!

 Please get in touch with us at (800) 321-8173!

Why Do I Need to Get My Car Lift Inspected?

Man inspecting car lift

Car lifts are used in vehicle repair shops, car dealerships, and home garages. Depending on your needs, you can use a car lift to store your vehicle or lift your car for maintenance and repair.

As a mechanic, lifts are used constantly throughout the day to get underneath cars for necessary repairs. Over time, you will likely need to tighten a car lift’s bolts and pins, lubricate its posts, and tighten anchor bolts. In addition, you’ll need to check all the parts to ensure everything is in working order.

Car lifts need regular maintenance, like any mechanical equipment, to ensure continued safety. While monthly maintenance is recommended for any car lift, an annual inspection is critical for many reasons. 

What happens during an auto lift inspection? 

An auto lift inspector must confirm that all components are in working order and that your lift is safe. The Automotive Lift Institute (ALI) Lift Inspector Certification Program is the only independent certificate for lift inspector qualification in North America. While some may claim that their inspector can inspect lifts, choose one that is ALI certified. 

During an auto lift inspection, the ALI-certified inspector: 

  • Examines all accessible components for evidence of overloading or misuse
  • Checks the electrical wiring and components
  • Reviews the lift controls to ensure accessibility
  • Locates the safety instructions, lift safety labeling, capacity labeling, vehicle-lifting information, and any documentation
  • Verifies adequate clearances around the lift
  • Checks that all fastening devices are tight
  • Operates the lift and checks the operation of the positive stop
  • Verifies that the lift locks engage in the fully extended position
  • Checks all lubrication points for cleanliness and required lubrication
  • Checks all chains and cables for excessive slack

Every manufacturer provides specific instructions for correctly and thoroughly inspecting each lift. ALI inspectors are extremely qualified to inspect your lift, regardless of manufacturer. 

Benefits of an auto lift inspection 

An annual auto lift inspection by a certified lift inspector allows you to keep a safe working environment and your business in compliance, among numerous other benefits. 

Keeps a safe work environment 

Safety is the priority when a mechanic stands underneath a car weighing a minimum of 2,000 pounds. One minor issue with a lift can cause severe damage to the vehicle, the lift, and the mechanic. 

An annual auto lift inspection (at the very least) will ensure that your lift is safe and trustworthy and your work environment is safe for your employees. 

Identifies repair needs 

An annual inspection lets you identify repair needs before the issue becomes problematic. An inspector will review the lift from top to bottom and inspect every detail to ensure it’s in working order. 

Issues that arise will be noted so you can fix or repair the necessary parts. Using a car lift that hasn’t been appropriately inspected is a safety hazard to your employees and a liability for your business. 

Maintains employee trust 

Mechanics want to feel safe in their job, and standing underneath a vehicle that weighs at least 2,000 pounds is a significant risk. 

An annual inspection lets employees know that the car lift is safe and reliable, maintaining employee trust. 

Confidence for vehicle owners 

Vehicle owners will have confidence in mechanics who follow safety protocols for their working environment, including inspecting auto lifts. 

Vehicle owners take pride in their cars and don’t want to worry that the lift will malfunction while maintenance is done. A safe car lift provides confidence for customers. 

Stay on top of manufacturer-recommended timelines 

Every manufacturer has recommended timelines for maintenance and inspection. Following their specific recommendations keeps every part of the auto lift working in the best possible way. 

Extends the life of the lift 

If you let wear and tear affect your lift without inspection and repair, your car lift will not live a long life. 

However, an auto lift inspection allows a certified technician to inspect your lift, giving it a thorough workup. This complete workup allows everything to be tightened, greased, adjusted and fixed. 

An annual inspection extends the life of your auto lift. 

Keeps your business in compliance 

The American National Standard (ANSI), which outlines the safety criteria for proper vehicle lift operation, inspection, and maintenance, mandates that every lift be inspected at least once a year by a certified lift inspector. 

If you fail to meet these requirements, your auto lift will fail to comply with ANSI. Therefore, to keep your business in compliance, it’s required to have your car lifts inspected on an annual basis (at the very minimum). 

Peace of mind 

Nothing is better than peace of mind as a business owner, employee, or customer. An annual (at minimum) inspection of your car lift provides peace of mind to everyone- the mechanic standing under the lift, the customer whose vehicle is on the lift, and the owner responsible for the lift’s safety and operation. 

Lowers the risk of injuries 

Your employees are less likely to be hurt at work if you inspect your lift machines regularly. The inspector will check the emergency controls, steering, brakes, electrical systems, and hydraulic systems to ensure they are in good working order. The inspection also includes searching for physical problems such as corrosion, inspecting hooks for abnormalities, and determining the gauges’ accuracy. These actions lessen the likelihood of the device failing and causing an accident. 

Increases Productivity and Decrease Downtime 

Workflow is disrupted when lift equipment malfunctions, and some projects may have to be rescheduled. However, you can avoid mechanical breakdown with an annual inspection. Although the inspection process may seem lengthy, repairing the unit once it has completely failed will take far longer.

Contact SVI for your Parts and Maintenance Needs

Regular maintenance is the best approach to avoiding malfunctions and future difficulties. Should you need parts for your lift, SVI is here to help you. We have everything that you might need to stay safe and productive. Contact us today at (800) 321-8173 and we can offer you same-day shipping on in-stock parts!